
How to Connect a New Printer to Wi-Fi?
September 25, 2023

A pool of printers is available that offers various attractive technologies. Also, we have the convenience to choose from wireless and wired printer devices. When you get the new printer, you have to connect it to Wi-Fi, a smartphone, or a computer device. Different printers use different methods to connect to Wi-Fi networks. Also, it can be difficult to connect a printer to Wi-Fi if you are doing this for the first time. Hence, to help you connect your printer to Wi-Fi and start printing, we here share the various methods you can try. So, keep reading the blog till the end and learn how easily you can connect a new printer to Wi-Fi.
Method 1: Connect a New Printer to Wi-Fi (With a Touchscreen Panel)
Here are the steps you can follow to connect a new printer to a Wi-Fi network without a touchscreen.
-
First of all, turn on your printer device and keep it within the range of the Wi-Fi network.
-
Then, go to the Network or Wireless Settings option and tap on Setup.
-
In the next step, click on the Wireless Setup Wizard.

-
Now, you need to tap on your network name and type the password.
-
After that, you can connect to the network with the help of the printer interface or by using the companion app on the smartphone.
-
Lastly, check if the printer is connected to your Wi-Fi network by printing a document.
Connectnewprinter.com will help you get free consultants and assistance from experts around the clock. Also, go to the website and ask for professional help via call or live chat.
Method 2: Connect a New Printer to Wi-Fi (Without the Touchscreen)
If you are using a printer device without a touchscreen panel, then here are the steps you can follow to connect the device to Wi-Fi.
- Turn on your printer device and make sure it is close to the Wi-Fi router.
- Then, you have to set the printer in WPS connection mode.
- For that, touch and hold the WPS button on your printer device.
- Go to the router to press and hold the WPS button on your Wi-Fi router within two minutes.
- After that, it will start the connection process.
- Then, both of your devices will connect automatically.
- When the connection process is complete, you can print a copy of the document to see if the printer is working properly.
Also, turning on the WPS connection mode can be different from printer to printer. If you are using a printer, then you have to press and hold the Wireless and Cancel buttons together for at least 5 seconds.
Method 3: Connect a New Printer to Wi-Fi (Wired)
If you are unable to connect a new printer to a Wi-Fi network directly, then you can take the help of the additional device to do that. Here are the steps you can follow to connect your printer to Wi-Fi using a computer.
- Use the USB cable to connect the Wi-Fi router and printer.
- Also, make sure that the printer is in the range of the Wi-Fi network router.
- Then, plug the printer’s plug into a power source and turn it on.
- After that, wait for a while to let the router recognize your printer.
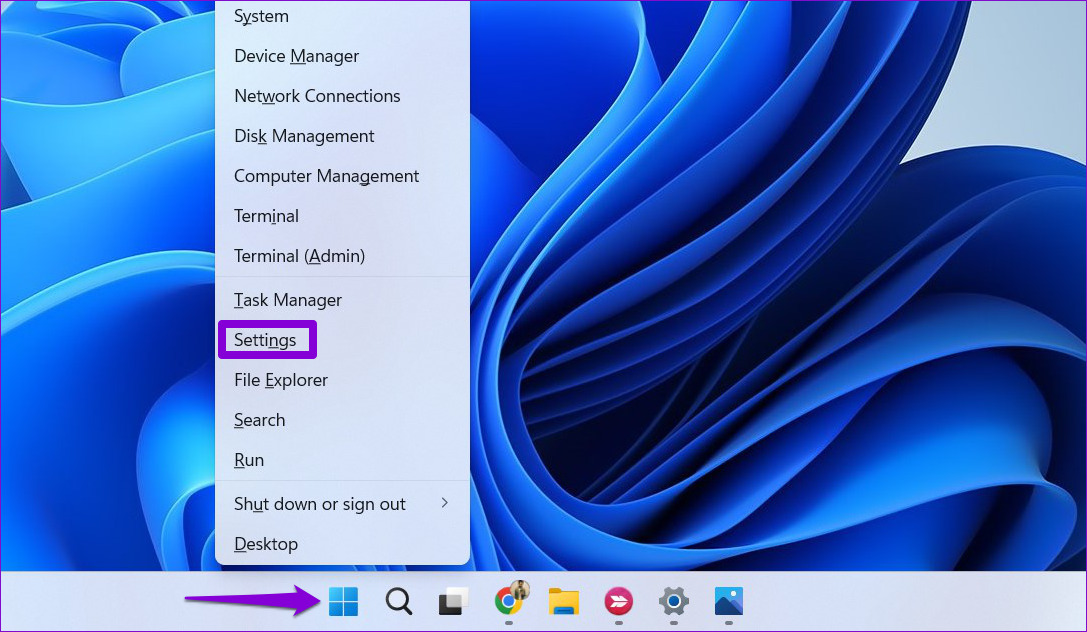
- In the next step, access the Settings window on your computer.
-
And then, go to Devices and click on Printers and Scanners.
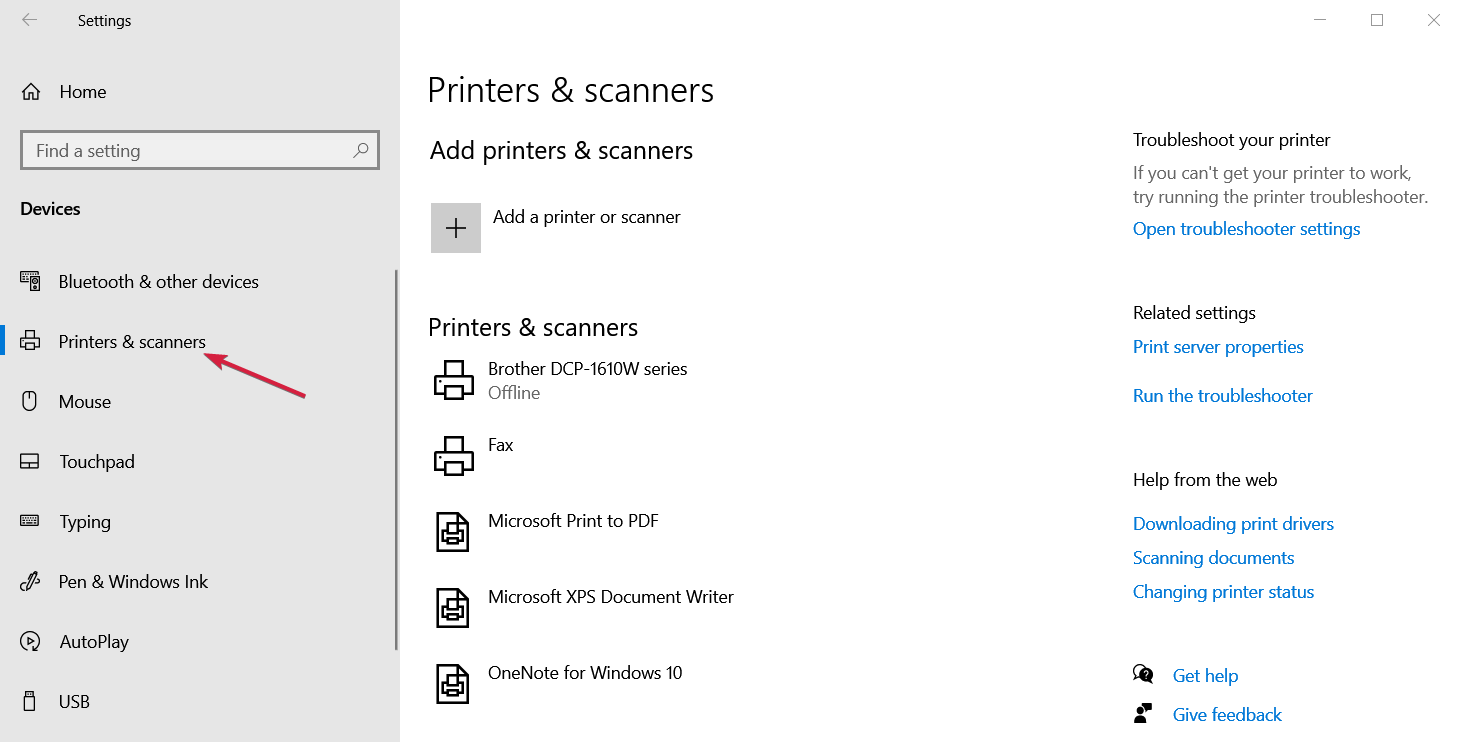
- Now, click on the option of Add a Device on the open page.
- Afterward, your printer model name will appear on the screen.
- Click on your printer icon and complete the connection process.
If you require any help or consultant for connecting your new printer to Wi-Fi, then you can call or chat with our live support agent on connectnewprinter.com.
Frequently Asked Questions
Question
How to Connect a Wired Printer to Wi-Fi?
If you want to connect a new printer to Wi-Fi using the USB, then here is the guide you should follow.
First, you have to connect the printer and router using the USB cable.
After that, turn on the printer by pressing its power button.
Wait for a couple of minutes to let the router recognize your printer.
After that, you can go to the computer’s Printers and Scanners window.
Choose the Add a Device option and then click on the printer name from the result.
Lastly, check if the connection process is complete by printing a test copy.
Question
Why is My Printer Not Connecting to My Wi-Fi Network?
Your printer is having any minor or major technical faults if it is unable to connect to the Wi-Fi network. One of the reasons could be that the printer is missing compatible drivers or you are using an outdated driver. Also, the printer and Wi-Fi router not being in range can be one of the reasons for that. You must get rid of the issue in order to use your printer. You can get instant professional help on connectnewprinter.com from the Support section at the top of the screen.
Question
How to Fix the Printer Not Connecting to Wi-Fi Issue?
Below are the best solutions you can try to fix the Wi-Fi connection issue in your printer.
First, reset/restart your printer device.
Update the driver or reinstall the compatible driver.
Make sure the printer and the Wi-Fi router are close to each other.
Restart the router.
Check if your USB cable is not damaged.
Contact the customer service of the printer brand and others.
Enter your Comments Here: