
How to Connect a New Printer to Laptop?
September 25, 2023

A wide collection of wired and wireless printers are available on the market. Various prominent brands provide the most robust printing devices to get great results quickly. Also, these printers are equipped with advanced features and are easy to use. As a result, users get an amazing printing experience. However, no matter what printer device you are using, you must connect it to a device in order to print or scan documents. If you want to connect a new printer to laptop, then here is everything you need to know. Get through the whole content to learn various methods to connect the printer to a laptop on both Windows and Mac devices.
The Process to Connect a New Printer to Laptop (Windows)
Here are the steps you need to follow if you want to connect a new printer to your Windows laptop.
Method 1: Wired Connection
-
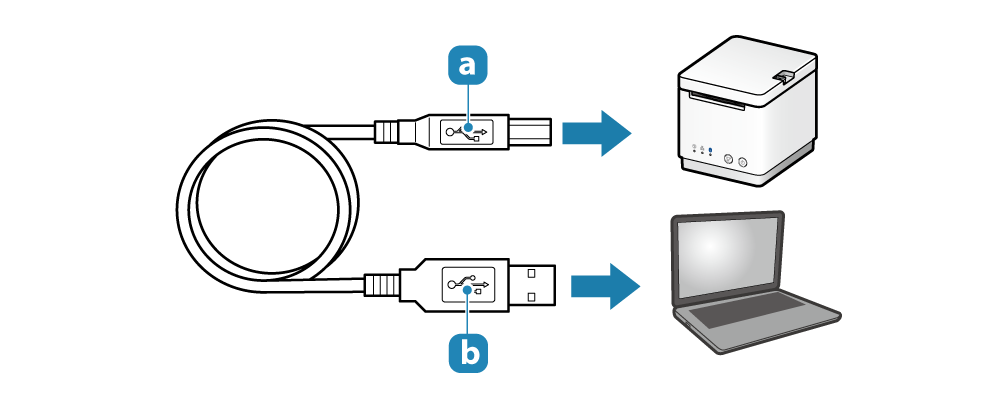
Start by taking the USB cable and then connecting the ports of your printer and laptop.
- Then press the printer power button to turn it ON.
- After that, click on the Start menu option on the desktop and click on the Settings option.
- Next, go to the Devices option and then select the Devices and Printers option.

- And then, select the option of Add a Printer or Scanner.

- Moreover, choose the name of your device and then click on the Add Device option.
- Now, the printer will search for the driver model and then add the printer to your list of devices.
- If you are having any issues, then make sure the printer is close to the computer and wireless router.
Method 2: Wireless Connection
- Firstly, turn on your wireless printer and then click on the power button.
- After that, click on the Start menu option and then choose Settings.
![]()
- Then go to Devices and select the option of Devices and Printers.
- Next, select the option of Add a Printer or Scanner.
- Choose the printer you want to connect to, and then click on the Add Device option.
- After that, your printer will be connected.
If you want to get additional help or free consultation, then visit the connectnewprinter.com website. You can get 24/7 instant support on our website to get help via call or chat.
The Process to Connect a New Printer to Laptop (Mac)
You can use the below guide to connect the new printer to a Mac laptop.
Method 1: Wireless Connection
- On your Mac laptop, click on the Apple menu option.
- Then, choose System Preferences.

- After that, click on the Print & Scan option.
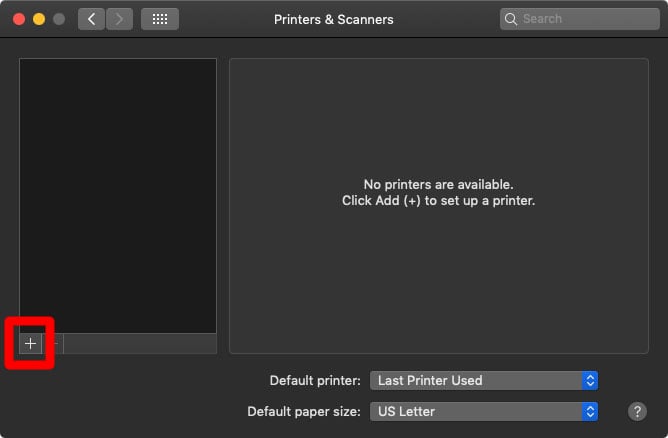
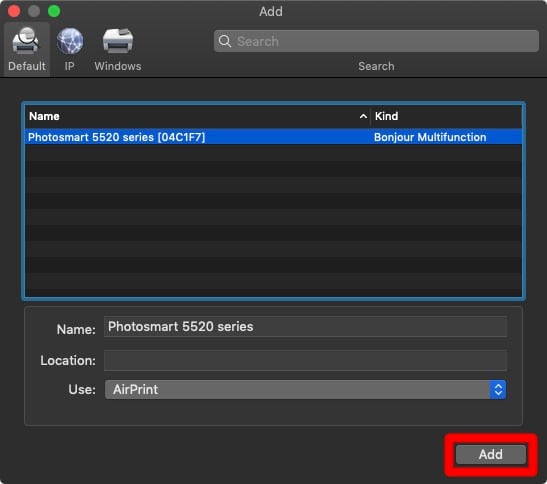
- To connect your printer, click on the plus (+) sign.
-
Now, the device will search for your printer; click on the model number of your printer device. Now, your device will be discoverable for your network.
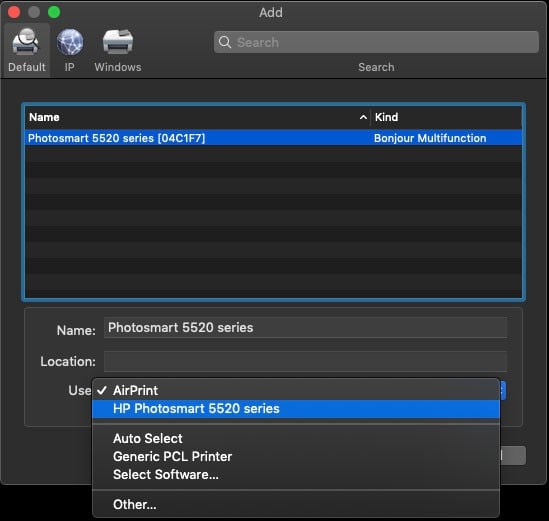
- Then, you need to click on your printer driver or software option in the Use field. You need to choose from the follow-up option.
- Lastly, click on the Add option. Now, the printer will be added to your printer list.
Method 2: Wired (USB) Connection
- Plug the USB cable into the Mac laptop and printer.
- And then, click on the Apple menu option on your Mac laptop.
- Then, access the System and Preferences option.
- After that, click on the (+) sign on the next page.
- It will show the name of your printer; click on the printer name to connect the device.
- And then click on the Add option.
- Finally, the printer device will be connected to your Mac laptop.
- Print a test copy to check if the printer is working properly.
Connectnewprinter.com offers a free consultation from printer professionals. On our website, you can go to the Support section and chat with the available customer executives. Also, if necessary, you can request a call to talk to the experts.
Frequently Asked Questions
Question
How Do I Connect a New Printer to Laptop (Mac)?
Here is the IP address method to connect the new printer to a Mac laptop.
Firstly, open the System Preferences window and then go to Devices and Printers.
After that, click on the plug (+) sign on the next window.
Then, go to the IP tab and enter the IP address in the Address field. (You can print the configuration page if you do not know your printer’s IP address.)
Now, your device will search for your printer.
You can also rename your printer device if you want.
Go to the Use field to specify which printer driver you want.
Then, you have to click on the Add option.
Lastly, the printer will connect to your Mac laptop.
Question
What is the Reason for the Printer Not Connecting to a Laptop?
A plethora of reasons can contribute to the issue of printers not connecting. The primary reasons can be the outdated driver, incompatible device, missing driver, and others. You first try to find out the reasons behind the issue, then take steps accordingly. Also, you can get professional help or contact the customer support team of the printer brand you are using.
Question
How to Connect a New Printer to Laptop (Windows)?
If you want to connect your new printer to a Windows laptop, then here are the steps you need to follow.
First and foremost, turn on your printer device.
Now, on your Windows laptop, click on the Start menu option.
After that, go to the Settings window.
And then, click on the Devices option and then choose Devices and Printers.
In the next step, select the option of Add Printer.
When your printer name appears on the display, then click on it.
Now, the printer will be shown connected to your laptop.
Enter your Comments Here: