
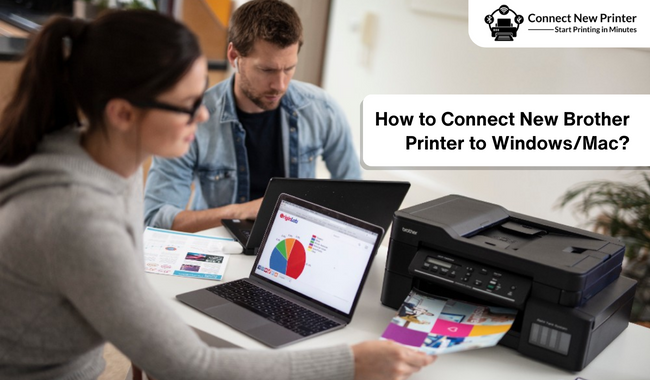
How to Connect New Brother Printer to Windows and Mac
December 14, 2023

Brother printers act as affordable and award-winning solutions for home and office use. You can select from a wide range of models available in the Laser, Label, Color, and Inkjet printer series. Are you looking to get started with your Brother printer setup? I am here to help you through the process of connecting your new Brother printer. So, whether you have a wired or wireless printer, you can learn the setup process and begin printing.
I am a proficient printer professional with over five years of experience in providing assistance. Since my work is related to this domain, you can expect successful connection steps from my side. This post can help you move forward in the process.
Connecting Brother Wired Printer to Windows/Mac
Do you want to connect your new wired Brother printer? You can perform these quick steps to add the printer on your Windows & Mac devices. I am going to explain the process of connecting on both devices separately.
For Windows
Brother printer users can easily connect their devices with these quick steps. So, if you have a new Brother, you can also follow this for its Brother printer setup.
- Firstly, set your printing device near the computer.
- Now, click on the power button on your printer to turn it on.
- After that, use a USB cable to plug the printer into your computer.
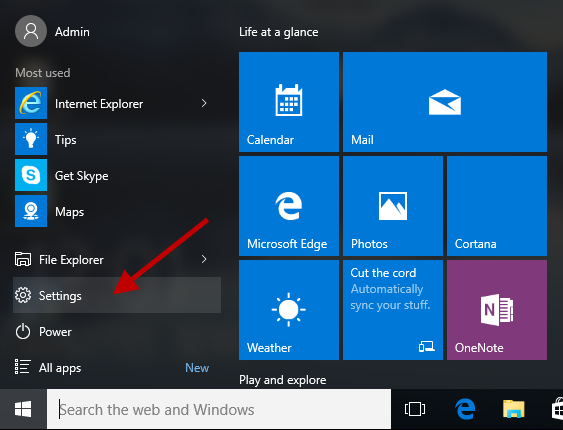
- In the next step, click on the Windows logo to open Start.
- Then, tap on Settings. You can find it on the lower-left side of the window.
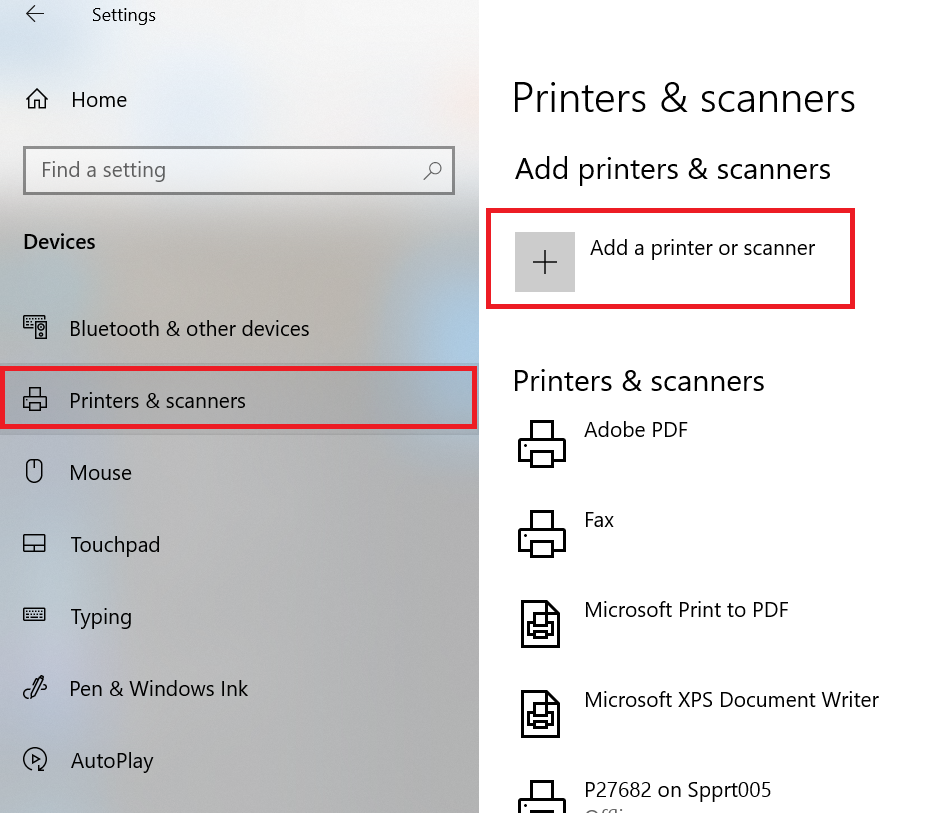
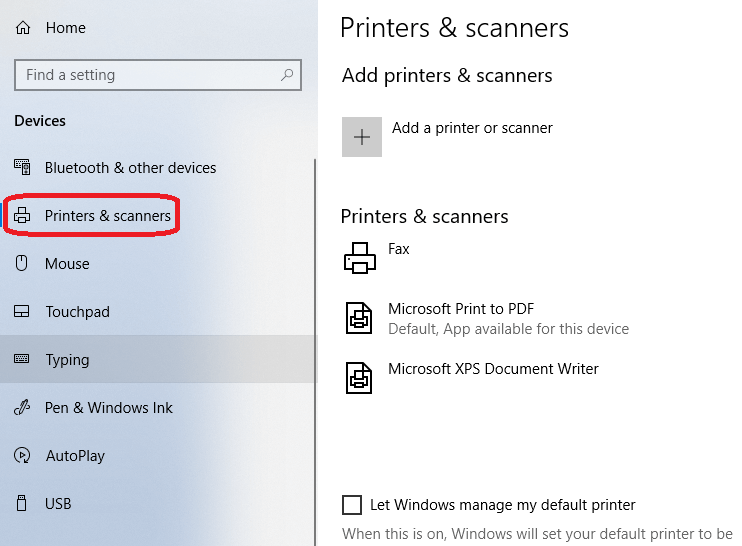
- Following this, tap on Devices.
- Afterward, hit on Printers & Scanners.
- Click on Add a printer or scanner.
- Next, click on the name of your printer and tap Add device.
- Thereafter, insert the CD into the disc slot of your computer.
- Alternatively, install the driver’s software if your printer doesn’t include a CD.
Thus, you can do Brother printer setup efficiently on your Windows computer. However, if you face difficulties in the process, contact printer experts by clicking on the support tab of our connectnewprinter.com website. Printer professionals provide free consultations via phone calls or live chat to help users in using their printing devices.
For Mac
New Brother printer users can connect their devices to Mac computers and print the documents they need. Here are some simple steps to help users connect their devices to Mac computers.
- Initially, update your Mac computer.
- Next, place your Brother printing device close to the computer.
- After that, press the power button on your printer.
- Then, confirm that your computer is turned on and logged in.
- Thereafter, plug your printer into the computer with the help of a USB cable.
- At last, click on the Download and Install or Install button.
These steps can help you with the complete installation process. After the installation finishes, you can use your printer with the Mac computer and print whatever you want.
Connecting Brother Wireless Printer to Windows/Mac
As a wireless printer user, you can connect your printer to a Mac and Windows computer wirelessly. Have a look at the process below and complete the connection successfully. First, I will explain the steps for connecting the printer to Windows.
For Windows
Follow these steps and add your printer wirelessly to a Windows computer. You can execute them to setup Brother printer seamlessly on your device.
- Firstly, go to the Start menu on your Windows computer.
- After that, you will find the Windows Settings page.
- Click on the Bluetooth & Devices box.
- Then, tap on the Printers & Scanners.
- Afterward, click on Add Printer or Scanner.
- Now, wait till your Windows searches for your wireless printer.
- Further, find your Brother wireless printer.
- Finally, tap on the Add device button.
So, you have learned the way of connecting your wireless Brother printer to a Windows computer. But if you have a Mac computer, you can look into the process below for a successful Brother printer setup.
For Mac
Have you learned how to connect Brother printer to Wi-Fi? Let’s know the process of adding your Brother wireless printer to a Mac computer.
- Begin by turning on your Mac computer.
- In the next step, click on the Apple icon.
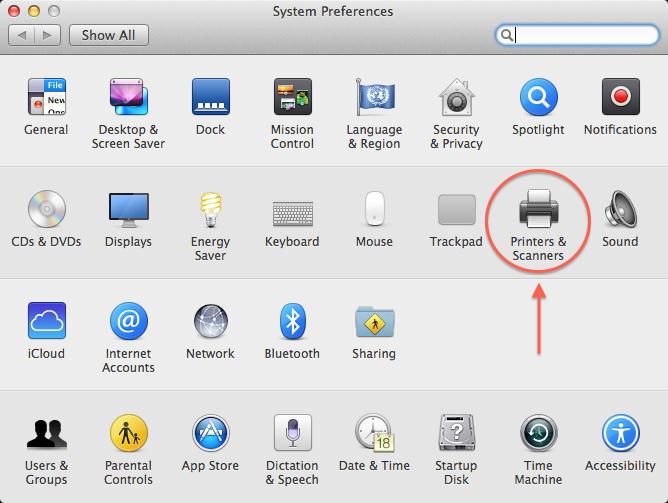
- Then, select the System Preferences icon.

- Further, select the Printers & Scanners symbol on the System Preferences page.
- Click the icon on the new Desktop page and tap on the Add button.
- After the process completes, select the Scan button.
- Finally, end the setup process for your Brother wireless printer.
These are some quick instructions to connect a Brother printer wirelessly to a Mac computer. For more, you can also watch the video below. It explains the process with step-by-step instructions:
Conclusion
Brother printer provides users with an efficient way to print and scan documents. But, if you have purchased a new printer, you will need to learn how to perform Brother printer setup. This printer is easy to use on Windows, Mac computers, and other devices. Before you get into the setup process, make sure to determine whether you have a wired or wireless printer. Once you find it, you can move towards adding the printer to any device you want.
Frequently Asked Questions
Question
How to Solve Brother Printer Not Responding to a Mac Computer?
Do you need help getting your printer to work on a Mac computer? Try these solutions to fix not-responding issues.
- Firstly, click on the Apple menu.
- Next, go to System
and Preferences.
- Then, tap on Printers
and Scanners.
- Now, hold the control key on your keyboard.
- After that, select Reset printing system.
- Now, your printers and scanners will be empty.
- Lastly, add your Brother printer again.
Question
How Can I Connect Brother Printer to a Wireless Network?
You can use the WPS method to connect your printer to Wi-Fi. Go along with these quick steps for an efficient Brother printer setup.
- Plug in your Brother printer and turn it on.
- Now, use the printer menu.
- Next, move to Network
and choose WLAN.
- Select WPS/AOSS.
- Further, press and hold the WPS button on your router.
- At last, confirm the connection process.
Question
How to Connect Brother Wired Printer to Windows 7?
Add your Brother printer to your Windows 7 computer by following these easy instructions. It will help in commencing your printer successfully.
- First, turn on your printer.
- Click on the Windows
logo key.
- Select Devices
and Printers.
- Then, click on Add
a printer.
- Select Add a local printer.
- Finally, install the correct printer driver by following the on-screen instructions.
Enter your Comments Here: