
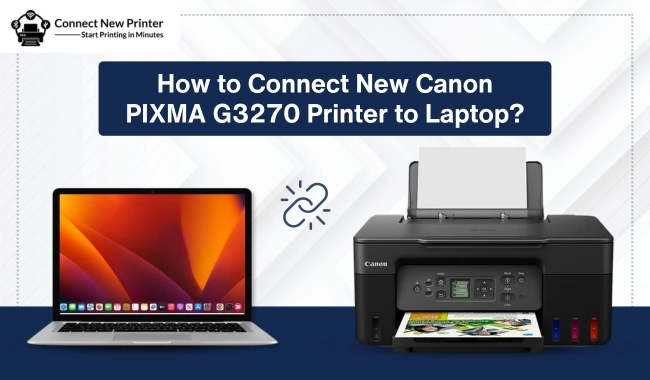
How to Connect New Canon PIXMA G3270 Printer to Laptop?
February 8, 2025

Connecting a Canon printer to a device can be a little intimidating, and you may wonder about all the steps. However, if you follow all the guidance of this blog carefully, you will easily connect your printer to it. Whether you are a new user or an existing user, you should follow this guide to learn the full connection process. So, you will learn "how to connect Canon printer to laptop" easily in this blog.

No matter which connection method you use, you must follow the steps carefully on your laptop. This way, you will easily get the benefits of printing with your advanced Canon PIXMA G3270 printer. You can expect a high-quality printing experience with it. Let’s understand the method now!
Method 1: Using a USB Cable
The first step is to connect your printer to a laptop using a USB cable. Check out the steps below to use these steps. Use all the steps mentioned to learn how to connect Canon printer to laptop properly.
Step 1: Get Ready With Your Connection
To start, ensure that your printer and laptop are ON before starting the process. Then, make sure your USB cable is ready to connect. Your printer usually comes with a USB cable. Also, ensure that the cable is compatible with your laptop and printer.
Step 2: Download Drivers for Your Printer
In the next step, you should get the necessary printer drivers for your Canon PIXMA G3270 printer. To download and install them, you should visit Canon’s official website, https://ij.start.canon. Once you see the latest driver packages, you can hit the Download button and get them on your device.
Step 3: Connect Your Printer to a Laptop
To connect your devices together, use a USB cable. Connect one end of the cable to your printer and the other end to the laptop. Now, power on both of your devices.
Step 4: Setup Your Canon PIXMA G3270 Printer
To Setup your printer, move on to the Control Panel and click on Devices and Printers.
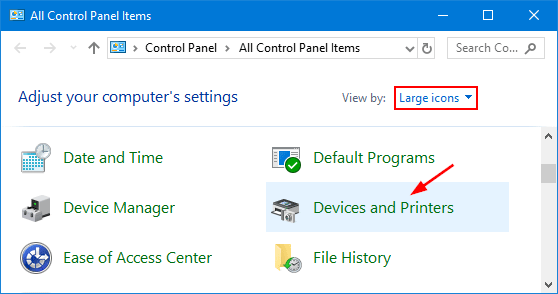
Now, hit the “Add a printer” option and choose your printer from the list. After that, your laptop will recognize your printer via the wired connection. Lastly, hit the Next button and go with the on-screen prompts to set up the printer.
Step 5: Test the Printer Connection
When you are done with your printer connection to a laptop, you can proceed by printing a test page. Now, go to your Control Panel and then click on Devices and Printers. Now, right-click on your printer and choose “Printer properties.” Finally, select the Print Test Page option. If the printing goes well, your printer is all set to use.
Method 2: With a Wi-Fi Network
A wireless connection is a great option for setting up a printer on a laptop. Check the steps below to learn how to establish a wireless connection.
Step 1: Prepare Your Canon Printer
In the first step, confirm that your printer is wireless, and check if it has a Wireless button or symbol. You should also verify that your wireless connection is working properly.
Step 2: Activate the Wireless Connection on Printer
Find and press the “Wireless” button and wait for the light to start flashing. When the light starts flashing, go ahead to establish the connection.
Step 3: Connect Your Printer Wirelessly
In the next step, hit the Color or OK button according to your printer model. When the light stops flashing but remains lit, it shows that the connection is complete.
Step 4: Download & Install Printer Drivers
To get the printer drivers, head to Canon’s website and find the drivers for your particular printer. Now, download and install them on your laptop.
Step 5: Add Your Printer to a Laptop
In this method, you need to head to the Control Panel on your laptop. Then, move on to the Devices and Printers option. Next, hit the “Add a printer” option and choose your printer from the list. If you face any issues, confirm that both devices (laptop and printer) are connected to the same wireless network.
Step 6: Test Your Connection
In the last step, test your printer’s print functions. To do that, go to the Devices and Printers option and right-click on your printer. Then, select the “Printer Properties” option and hit the “Print Test Page.” If your print goes fine, you have set up the right type of connection.
Conclusion
Finally, you know 'how to connect Canon printer to laptop'. A wired and wireless connection allows you to print with flexibility. With a wireless printer connection, you are free to print from anywhere, anytime. Hence, follow all the steps given in this blog to set up a connection between your printer and laptop. Regardless of what method you choose, don’t forget to install the important printer drivers.
Frequently Asked Questions
Question
How to Setup Canon Printer on a Mac?
To connect a printer to your system, use these steps:
- First of
all, install the important printer drivers.
- Then, go
to the Apple menu settings on your system.
- Now, head
to the System Preferences option.
- After
that, click on the + sign to add your device.
- Select
your printer model from the on-screen list of available printers.
- At last,
click Add to verify the selection and send a test print to your printer.
Question
How Do I Download Canon Printer Drivers?
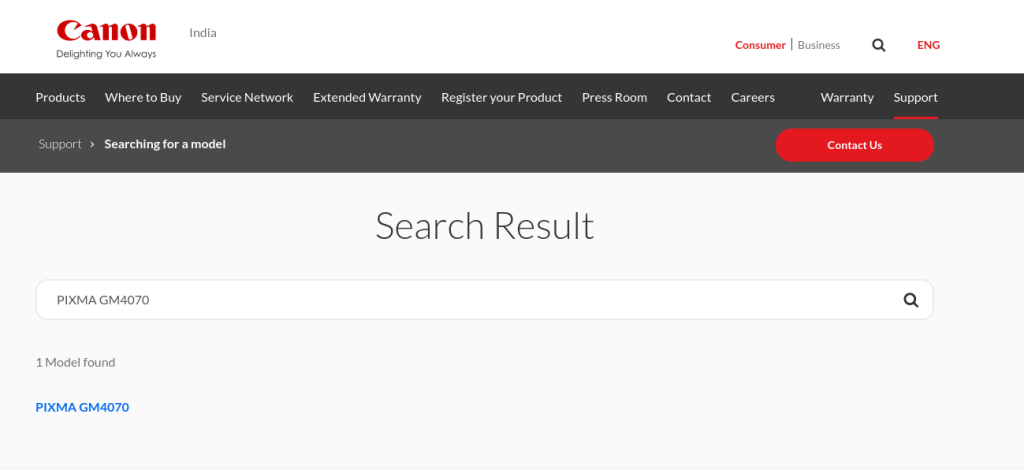
To get the printer drivers, visit the Canon support page. On that page, enter your printer model in the given field and
confirm that your printer model is correct. Then, choose your operating system
from the given list. Now, you will see a list of printer drivers on the screen.
Choose a suitable package for yourself, and download it on your computer.
Question
How Do I Connect My Canon Printer to My Device?
You can connect your printer to a device by following the given steps:
- First, go to the Settings on your computer.
- Then, head to the Bluetooth & devices option.
- Now, click the Printers
& scanners option.
- Click on Add
a printer or scanner option, and click Add device.
Enter your Comments Here: